My Web Server Configuration
This blog introduce the detailed configuration of my cloud server, including customizing shell theme and vim theme. It also tell you how to run a apache http server and deploy your blog resource to the server.
1. Get Cloud Server
I bought it from Tecent Cloud.
学生云服务器_学生云主机_学生云数据库_云+校园特惠套餐 - 腾讯云 (tencent.com)
2. Configuration
(1) Set basic environment
a. switch to zsh
Install zsh
1 | sudo apt-get update |
Change default shell to zsh
1 | chsh -s /bin/zsh |
Close and reopen terminal, then use
1 | echo $SHELL |
to check if you have seccessfully changed to zsh
b. install oh-my-zsh
I choose oh-my-zsh. A powerful and beautiful zsh shell theme.
It’s hard to directly download files from github in China, so I use a domestic mirror to accelarate the procedure. If you don’t have that problem, just follow the instruction from here to install it.
Download install.sh by
1 | wget https://gitee.com/mirrors/oh-my-zsh/raw/master/tools/install.sh |
Change the below lines
1 | REPO=${REPO:-ohmyzsh/ohmyzsh} |
to
1 | REPO=${REPO:-mirrors/oh-my-zsh} |
Then run
1 | zsh install.sh |
Modify the remote url of oh-my-zsh to make it update from the mirror instead of github
1 | cd ~/.oh-my-zsh |
c. enable ssh pubkey authentication
Generate your local rsa key pair
1 | ssh-keygen -t rsa |
Copy the content of id_rsa.pub and add to ~/.ssh/authorized_keys.
Then entersshd_config to enable authentication
1 | sudo vim /etc/ssh/sshd_config |
uncomment those two lines
1 | PubkeyAuthentication yes |
restart sshd service
1 | systemctl restart sshd |
d. keep connection alive
It annoys me that my cloud server always disconnect with my local ssh terminal after a period of time without manipulation. One solution is to modify /etc/ssh/sshd_config.
Uncomment those two lines:
1 | #ClientAliveInterval 0 |
and change them to:
1 | ClientAliveInterval 60 |
which means the server will send signals to client every 60 seconds to keep the connection alive, and the connection will be closed if denied for 3 times.
Then restart sshd service
1 | systemctl restart sshd |
Reopen the terminal, then you won’t be disconnected
(2) Oh-my-zsh advance config
a. color themes
You can select various color themes, my favorite is agnoster.
It looks like that:
Change it by modifying ZSH_THEME="agnoster" or something else in ~/.zshrc.
If you do not want to display user name and server name, just like me, add prompt_context() {} at the end of ~/.zshrc .
Check Themes · ohmyzsh/ohmyzsh Wiki (github.com) to find more oh-my-zsh themes.
b. add plugins
I add three plugins to oh-my-zsh
zsh-autosuggestions and zsh-syntax-highlighting need manual installation
1 | git clone https://github.com/zsh-users/zsh-autosuggestions ${ZSH_CUSTOM:-~/.oh-my-zsh/custom}/plugins/zsh-autosuggestions |
z has been installed by default.
Then add these plugins to plugins = (...) in ~/.zshrc, just like below
1 | plugins=(git z zsh-autosuggestions zsh-syntax-highlighting) |
Note that git is both installed and added to plugins list by default.
You can add as many plugins as you can, but it may slow down the zsh shell, be cautious!
(3) Vim advance config
This is my personal configuration file .vimrc
1 | syntax on |
I use Vundle, the plug-in manager for Vim as my vim plugin manager.
To install Vundle, run git clone https://github.com/VundleVim/Vundle.vim.git ~/.vim/bundle/Vundle.vim, with Vundle, you can manage your vim plugin more conveniently.
You can choose awesome vim plugins from Vim Awesome, type vim +PluginInstall +qall every time you add plugins between call vundle#begin() and call vundle#end().
This is how it looks like.
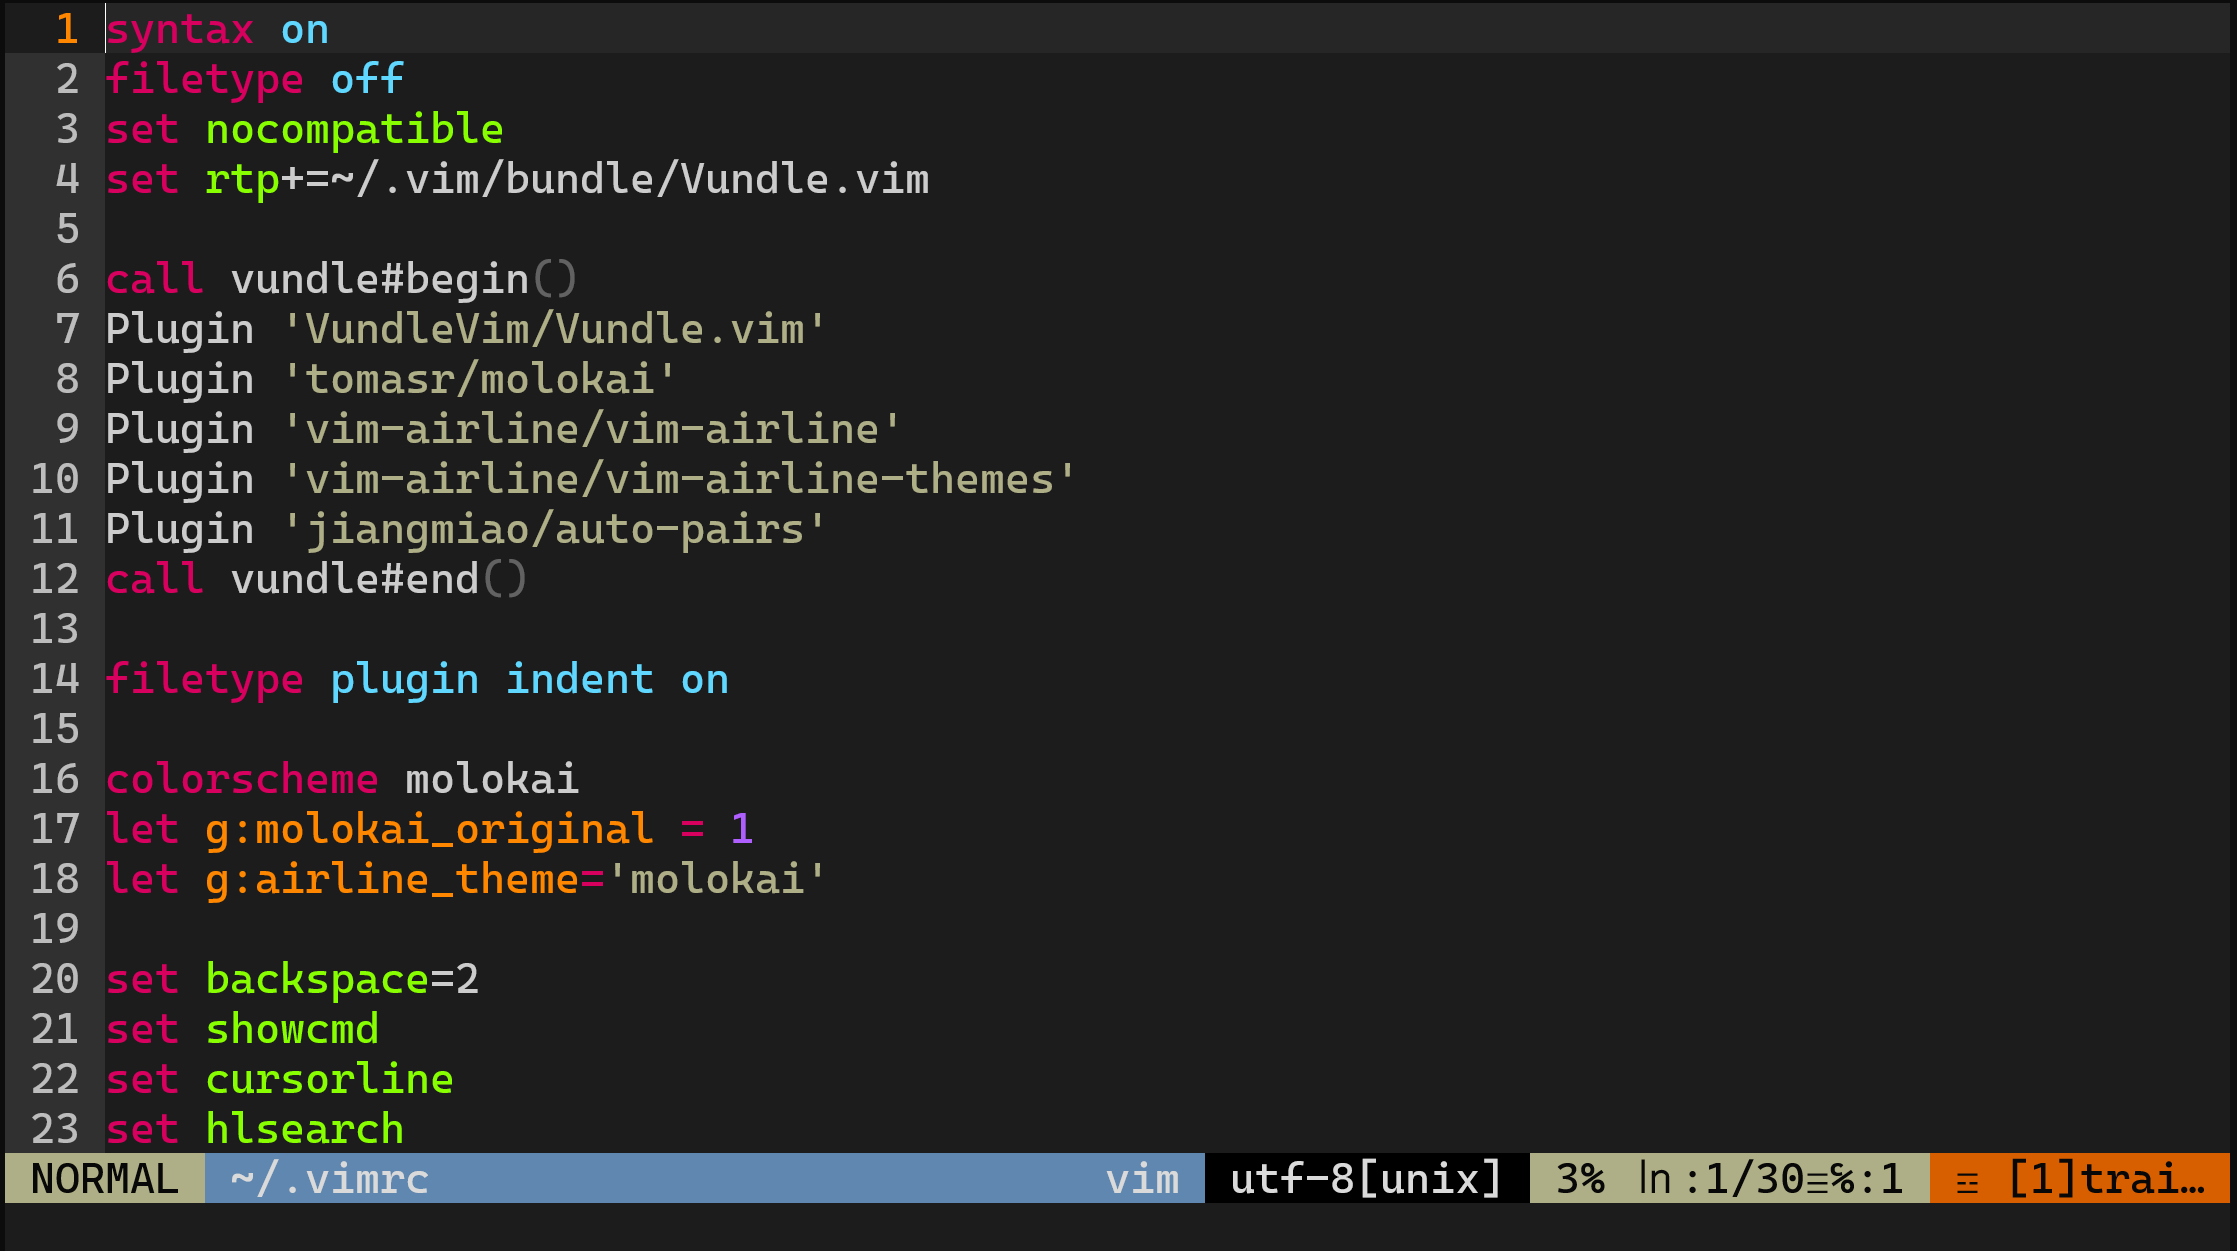
tomasr/molokai, vim-airline/vim-airline and so on are all plugins that I added, but keep in mind that too many plugins may slow down your editor, so I prefer to install most necessary vim plugins only.
(4) Apache server
I use apache as the web engine to post my blogs.
1 | sudo apt update |
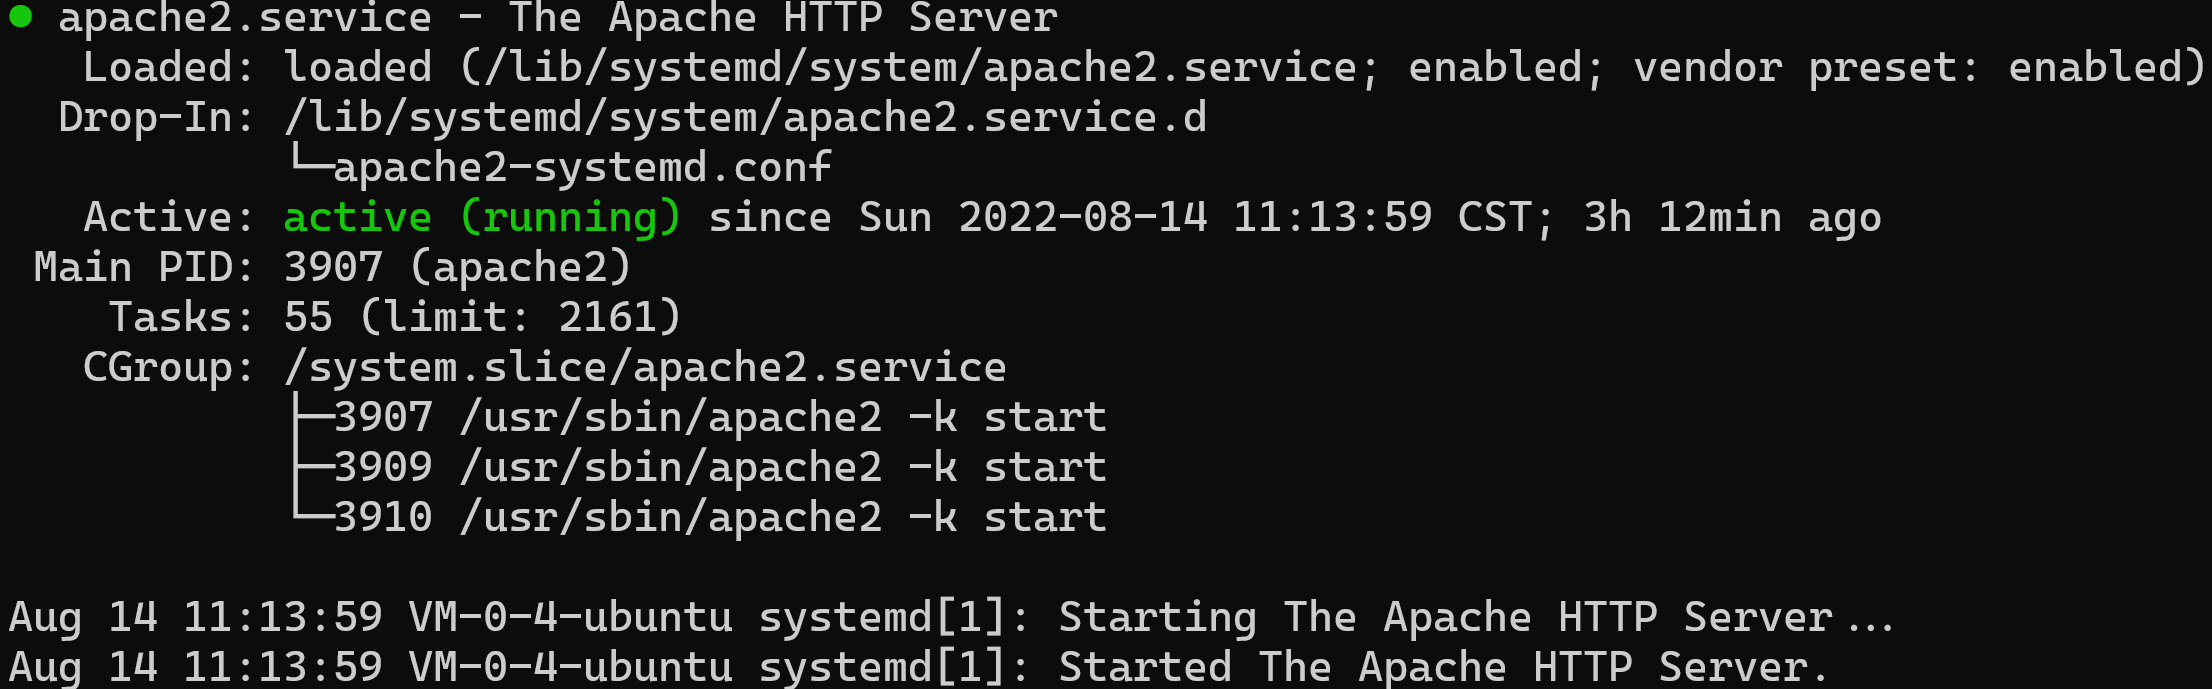
See if apache service is running in your server.
1 | sudo systemctl status apache2 |
Then type my server’s IP address in browser
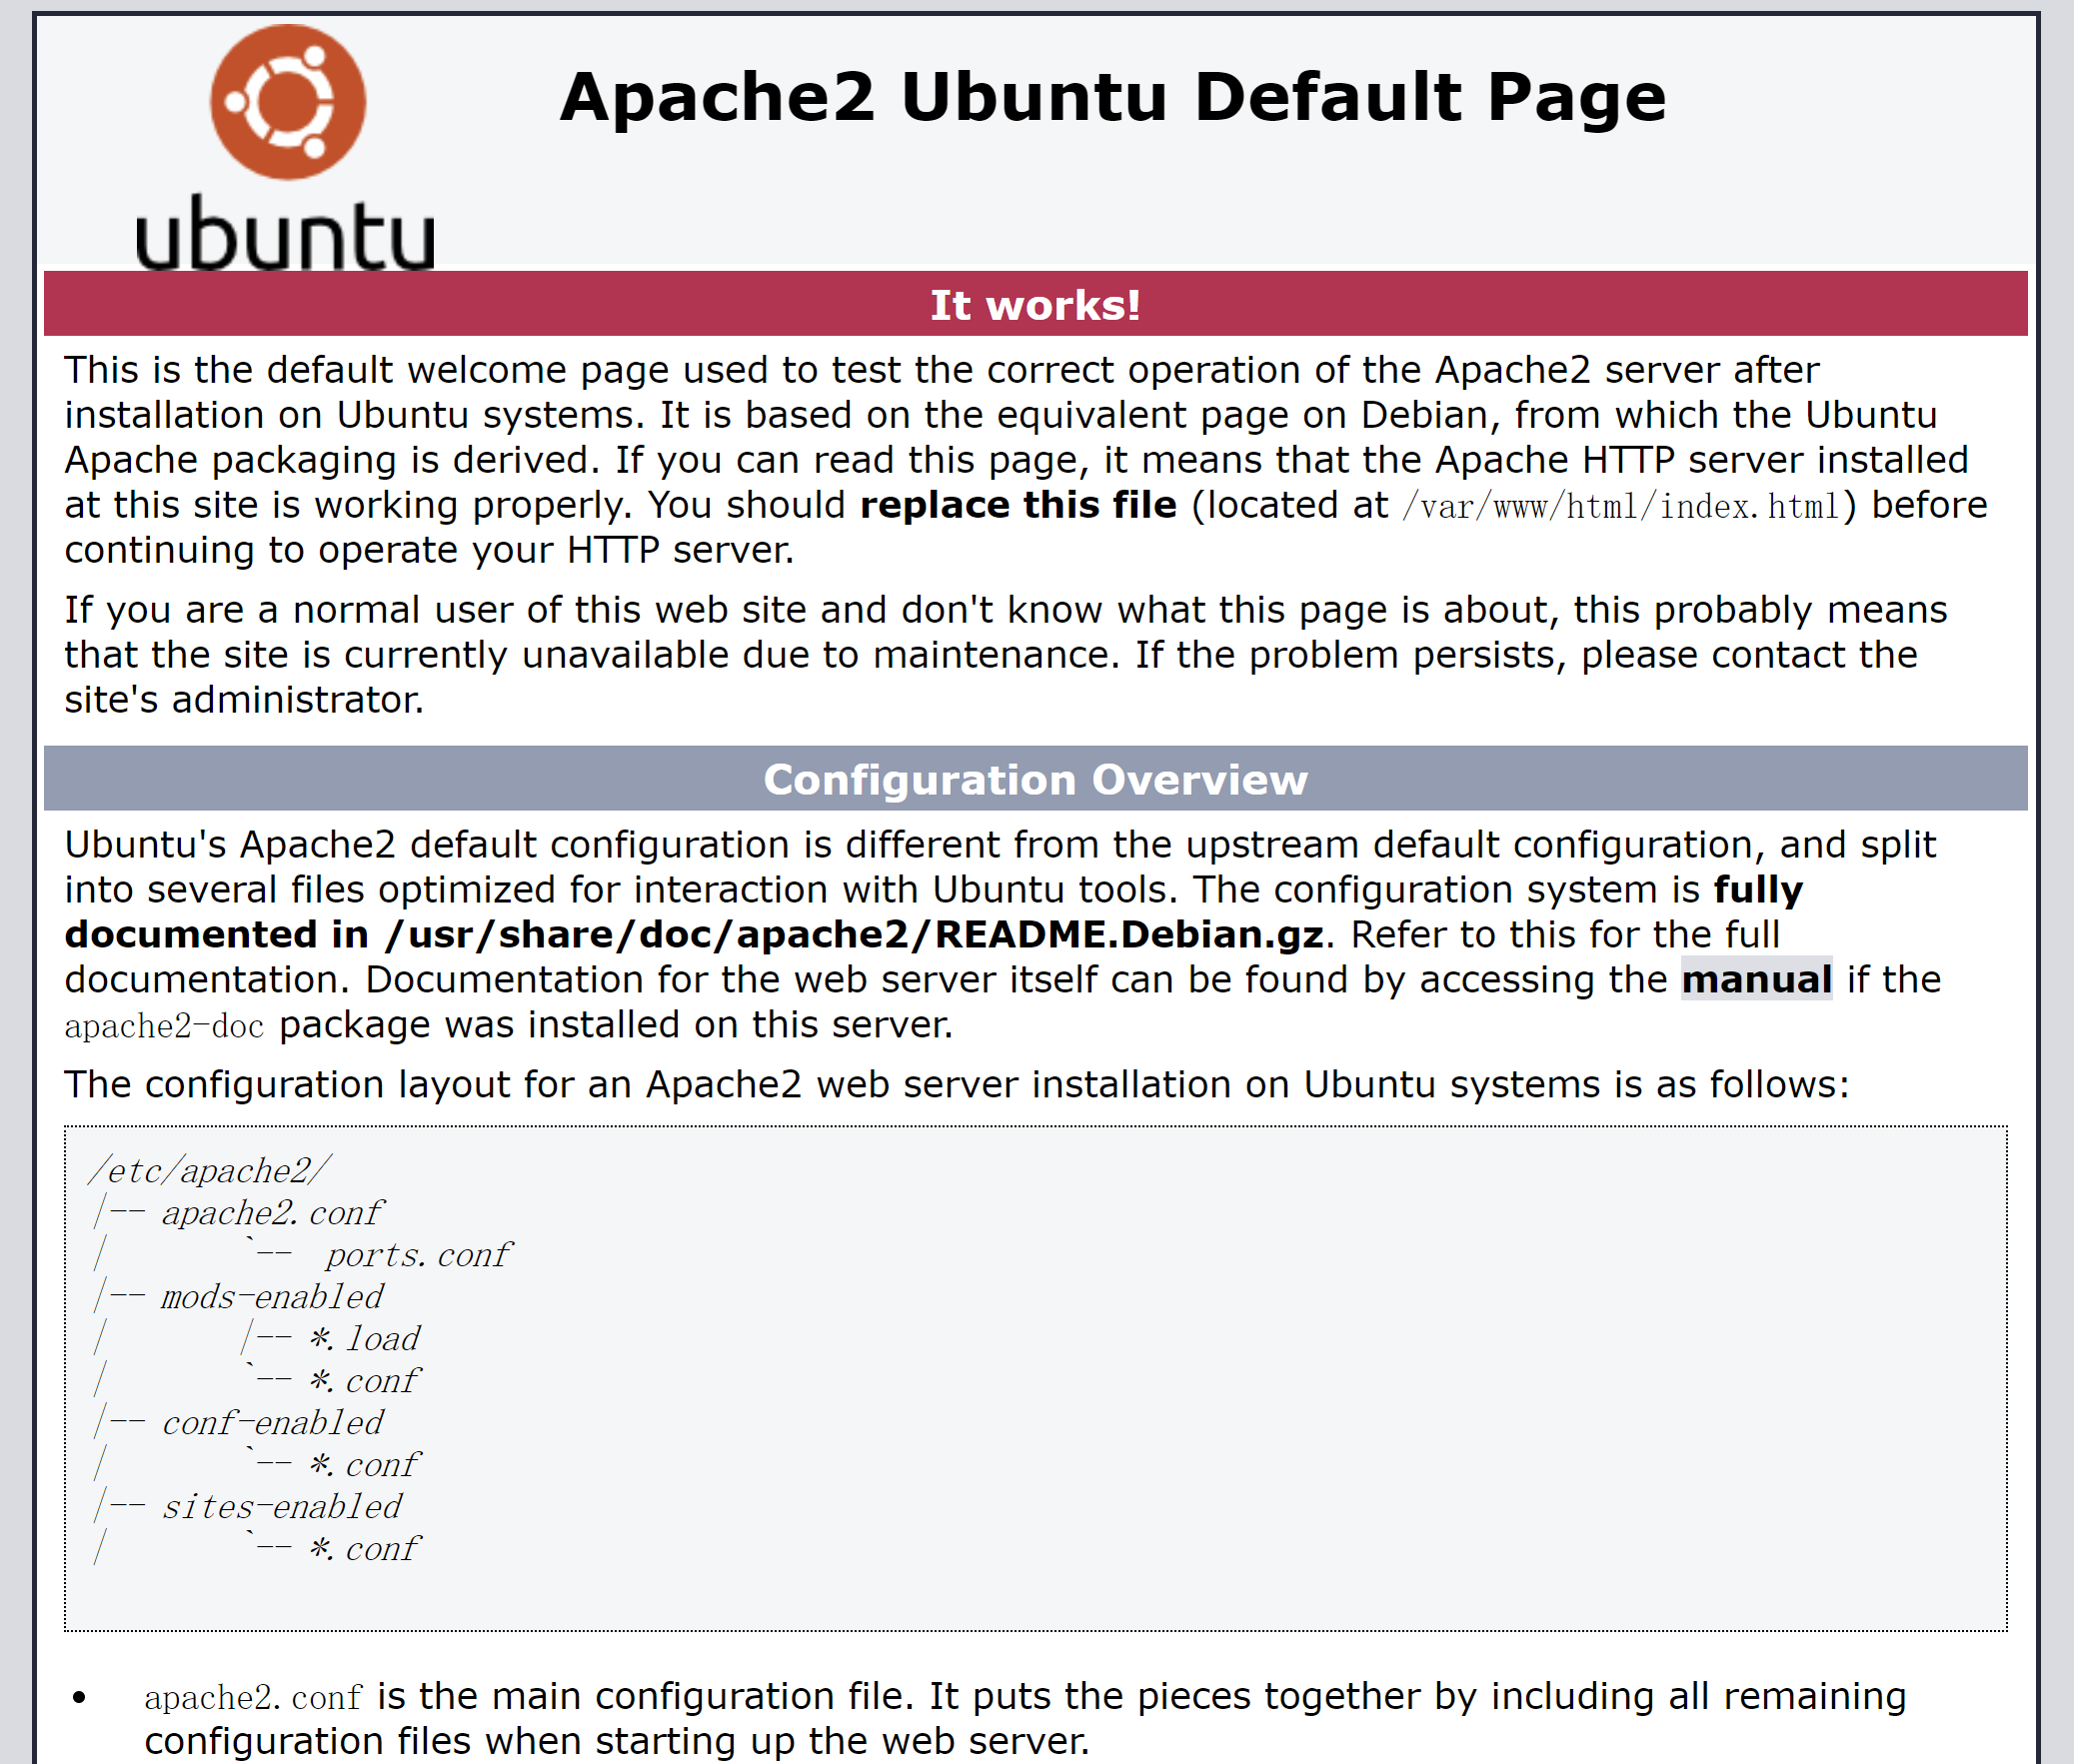
Done!
Substitute /var/www/html/index.html with your own resources, such as your blogs, then people can go to the website to view your blogs.
My Web Server Configuration